This guide covers the steps to blacklist a site in your Cisco Umbrella account.
Cisco Umbrella provides cloud-based security and content filtering to protect users from malicious and unwanted websites. If you need to prevent access to a website, you can block it using Destination Lists.
At Frozen Lake LLC, we pre-create destination lists for our customers to simplify the management process. This guide walks you through adding a site to an existing Destination Block List.
Step 1: Log into Cisco Umbrella
- Open your web browser and go to https://umbrella.frozenlake.net.
- Enter your admin credentials and click Login.

Step 2: Navigate to Destination Lists
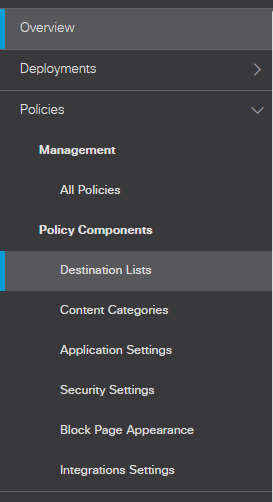
- Once logged in, go to the Policy Components section in the left sidebar.
- Click Destination Lists.
- You will see a list of pre-created destination lists for your organization.
Step 3: Select the Appropriate Block List
- Find the Destination Block List that applies.
- Click on the list name to open it.
Step 4: Add a Website to the Block List
- In the Add a destination box, enter the URL or domain name you want to blocklist. [Blue Box below]
- Example:
example.com(this will allow all subdomains of example.com) - Example:
sub.example.com(this will allow only that specific subdomain)
- Example:
- Click Add to confirm the entry, once added, click Save. [Red Boxes below]
- The website should now appear in the list of allowed domains.
- Click Save to apply the changes.
- Wait a few minutes for the settings to propagate.
- Test the website by accessing it from a device affected by the policy.

Was this article helpful?
That’s Great!
Thank you for your feedback
Sorry! We couldn't be helpful
Thank you for your feedback
Feedback sent
We appreciate your effort and will try to fix the article